Saturday 29 September 2012

On-The-Fly WIM editing with WinToolkit


I recently discovered a tool called "Wintoolkit" by Legolash2o - see this link for a download. So far I've found the tool to be a great time-saver. It allows you to perform on-the-fly WIM file editing, without the need to use command-line tools.


Some of the great features include:

Windows Component Removal 

I used this to finally rid my WIM of Windows Media centre and default Aero theme packs - this was made easier due to the program having descriptions of each component, as well as some warnings about other users experiences of removing that particular component!


WIM Registry Editor 

After I had already done my WIM capture I later found several registry tweaks I wanted to make, instead of putting these into group policy or adding .reg files to my task sequence I've now managed to put these directly into the WIM file. This also helps with remote office deployment where a group policy update isn't always immediately possible - I used this to configure settings like Internet explorer proxy etc.


Update Integrator

The program provides a facility to download all the latest OS upgrades and then will effortlessly build them into the WIM file - no messing around with dism or imagex required. I don't do this every time an update is released, but adding new updates directly into the WIM file once a month seems like a good idea, it just cuts down on the number of windows updates the user will have to download when you give them the PC.


As you can see from the image above - it allows you to pretty much integrate anything you can think of - theme packs, gadgets, addons, drivers, wallpapers etc. 


Language Pack Converter

A handy little tool that converts language packs into .cab files - making it really easy to add additional display languages to your WIM file - this is very relevant for companies like mine who are trying to achieve a global standard.


 Office MSP Extractor

Download all the Microsoft office updates extract MSP files from the .exe - then easily drop them into your installation source. This obviously increases the size of your office deployment, but saves time the user will spend installing updates and gives your the security of knowing the estate is up-to-date.


 Much More...

So much more useful things in here, such as ISO maker, unattended creator, USB boot prep, WIM manager. I won't be using all of these features as some are more aimed at home user/small office deployment scenarios, but it's nice to see them included anyway.

I hope this saves someone else as much time as it did for me.

Andrew


Saturday 8 September 2012

Finding and Deleting Duplicate Photos from your PC

Although I recently put a Solid state disk into my PC I've still been relying on a good old-fashioned mechanical disk to store my more precious data. Four 500GB Sata drives in Raid 10 holds everything from documents and letters to the family photo albums. Before I was content to have my photos on a raided drive with the infrequent backup to my server and an even more infrequent removable HDD dropped off at my dads house. With my son Nathan now just turned one I've developed  a new sense of fear for losing this data. Although the little man hasn't been around very long there has been thousands of photos taken of him and a surprisingly large volume of video clips.


Ideally what I would like to do is get all this data stored somewhere both secure, and reliable. But when I checked the size of the folder it came in at a whopping 107GB. Considering cloud based solutions such as Skydrive where you get 25GB free it was clear that this was never going to work.

The surprise of the sheer size of that folder got my interest in finding out what exactly was inside it! I began creating a new folder and started to organise photos into something more meaningful, but it wasn't long before I noticed a number of duplicates of the same photo.

It would appear that the problem is I'm too strict about keeping all photos - I want to keep *everything*. When synching up devices such as a camera phones, or cameras instead of overwriting existing images I allowed a new copy to be created. Add this up over the years with various photos been given to my from my family and then me backing them up again has created a folder with multiple nested folders with thousands of duplicates.

I decided that enough was enough and it was time to get rid of some of this - but how to start? It was clear that such a job couldn't be done manually. I turned my friend Mr Google to find my some software to do the job. I found programs like "Dup Detector" and "Doublekiller" after downloading and seeing annoying amateurish nagware and quickly finding out how garbage these programs were I eventually found my savior in a program called Visipics.

The reasons why Visipics is awesome are threefold.
  1. It's Free
  2. It's Awesome
  3. Did I mention it was free?
But the main reason to use Visipics is simply because it works and it's very easy to use. Just point the program at a directory and it will go through your photos and automatically find duplicates from the actual content of the image rather than just the file info as some other programs were using. You can adjust a simple slider to find images that are identical, nearly identical or slight variations of the same photos. Then it's a simple case of marking the photos you want to delete and pressing a big shiny "delete button".  After using Visipics I managed to get the size of my photos folder down to 28GB - in some cases I had twelve copies of the same photo. That's quite a saving.

OK, this won't impress everyone - but it did impress me!


Wednesday 20 June 2012

HP 3D Driveguard in SCCM Windows 7 Task Sequence

UPDATE 18/01/2014 - as of HP Driveguard version 6 the below guide will no longer work. HP have changed the package and released yet another broken installer upon us. I've figured this new version out and you can read the latest guide here:HP Driveguard 6 Guide.
 

This was a real pain, one of the last things on my "to-do" list for the build I was creating was to fix the program called HP 3D Driveguard.

This solution works with the following models/packages that I know of, others are likely supported as the same .exe files are used across different HP ranges.


2530p sp47282.exe
2540p sp53795.exe
2560p sp53795.exe
6930p sp47282.exe
8440P sp53795.exe
8460P sp53795.exe
2570p sp57318.exe
8470p sp59282.exe
9470m sp59282.exe


In the past this would have been the kind of little OEM utility I would have totally ignored,but after reading about it, the benefits are pretty clear. In a nut-shell, the software provides free-fall protection for the hard disk on supported HP systems. The HP Elitebook series motherboard is equipped with an accelerometer which providing the driver is installed, instructs the disk head to "Park" when the computer is either in free-fall or being moved around. The end result is that you have fewer disk failures, which will translate into fewer man-hours being spent recovering data, logging calls with the OEM and then rebuilding the notebook.

Now, to make this clear, there is no problem to install this software either manually or via Altiris or SCCM, the issue I'm writing about today only occurs when building the PC with an SCCM task sequence.

The software is packaged with installshield and automated installation is rather easy with just the using these switches:

sp53795.exe -s /V /qn

The installer is designed to be able to pass switches into an internal MSI file (as indicated by the /qn switch) but even this doesn't seem to work correctly as it runs in passive mode rather than full silent mode. In an SCCM task sequence this fails to install completely.

Some Installshield packages can be flaky and require logging to be enabled, so I tried enabling logging by adding the /f2 switch, but still got the same error.

After loads of different approaches including putting the switch into a batch file, installing via "run command line" I still couldn't get this working. Although the OSD task sequence doesn't halt, looking back through the logs I can see that errors occurred.
Eventually I found the way to get this working and here are the steps:
  1. Extract the .exe file with Winrar
  2. Inside the folder you will see several files:

     3. Open up the command prompt and browse to this folder, enter:

      setup.exe /extractall

This will leave you with even more files, including.... two MSI files!


    4. Now you need to create a package in SCCM with all the files inside this folder.


 5. Within this package create a program as below:


The full switch is:
msiexec /i HPMDPAI3264.msi /qn REBOOT=ReallySuppress TRANSFORMS=HPMDPAI3264.mst

     6. Lastly, add the program to your OSD task sequence.


Ensure to tick the "continue on error" check box, the program will error during the installation, I believe this is caused by the suppression of the reboot.

And that's it folks. All very easy and intuitive eh? Why didn't we know how to do this straight off the bat? For me this is just another area where SCCM seems to behave very differently than normal automated installations. There is always the option of installing this software after OSD without having to go through all of this, but let's face it - if you go to the lengths of automating a full build, why would you settle for this?
So, you finally got it working and then logged onto Windows 7 but found no resident tray-icon? It appears HP are no longer doing this, if you want to check it installed successfully, look in the Programs and Features menu in control panel.

Hopefully this information is helpful to someone, and saves them the hours it took me to figure this one out.

Andrew

Tuesday 17 April 2012

To SSD or not to SSD?

When Solid state drives (SSDs) first arrived on the scene the costs were near insane, people experienced mixed/poor performance, disks were quickly failing, owners experienced low lifespan and firmware constantly requiring upgrading - destroying all data on the disk in the process. This up until recently made having a SSD drive very difficult to justify.

The technology seems to have matured over the last few years, there are now more companies producing SSDs and they are being distributed by the large OEMs along with the latest and greatest computers. The reason for this popularity is undoubtedly the very high read/write speeds, low power consumption and silent,cool operation, with these benefits SSD is undoubtedly the next stage in the evolution of persistent storage.

I've been quite wary up until now, favouring my tried and tested mechanical disk; the familiar hums and clicks associated with the disk spindle churning away can be a comforting sound. You know when the drive is busy and when it's struggling to cope. When a drive is near the end of life you can usually hear a screeching noise and this at least gives you some warning if SMART doesn't pickup any errors. Saying that - I always thought it quite strange to have a mechanical bottleneck in your computer - the limitations of all that fast ram and processor can only write/read from the hard disk as fast as that mechanical spindle can churn. In an attempt to make up for the short-fall in read/write performance I've previously used multiple drives in RAID configuration, with each drive added the noise, heat and power used increased.

I first considered jumping on the SSD bandwagon when I upgraded my PC last year, but the costs of SSD still scared me little too much, having been the victim of HDD failures in the past, speed alone is not my sole concern, data redundancy and size of media in the past has played a significant role. When looking at prices for SSDs at the moment you generally pay around £1 per Gigabyte for low-end models - that can be pretty steep considering you are paying £120 for a 120GB drive, the last time I bought a drive so small was probably back in 2003, if I had a 120GB mechanical disk laying around, I probably wouldn't even consider installing it into my computer.

Despite my reservations the lure of all that speed has got me interested. I had been thinking about the minimum amount of space I can justify and what else I might want to use if for. The operating system, programs I use regularly and perhaps a few resource intensive games is what I decided. I checked my current OS/Programs drive and I'm using 160GB, after cleaning this up I'm down to 140GB - still too much data to fit one one of these cheaper 120GB drives. I found that certain companies such as Corsair and OCZ are selling their 180GB models at £165 and £154 respectively - this seems quite reasonable given the cost of the 120GB models, but with anything larger than this the costs rise dramatically. 180GB for me seems to be the reasonable "sweet spot" to install the OS, Programs and a game or two.

I've had a lot of experience with Corsair and generally found all of their products to be good, but OCZ is a company I don't have much experience with, after reading some reviews I'm still getting a very mixed opinion about both drives. Both the drives in my price-range use the same controller, the Sandforce SF-2281 and both make bold promises of read speed up to 525MB/s write up to 500MB/s, both support TRIM, RAID and have a MTBF greater than 2,000,000 hours. Being unable to see any great difference in the specifications and not wanting to annoy the wife too much I chose the cheapest option, the OCZ Agility 3 180GB.

The Agility series from OCZ is analogous of the Intel's Celeron vs Pentium strategy, in that both the Agility and Vertex ranges offer the similar speeds, but the Vertex series is more expensive. The reason for the need to differentiate these two is due to the kind of memory on the board. Agility uses Asyncronous NAND vs Vertex's Sychronous NAND. Synchronous offers more performance, but costs more to produce, it can maintain read/write speeds better during large file transfers and deals better with incompressible data.


Still being a little unsure of the decision I made in opting for the OCZ over my usual Corsair brand I decided to have an expert test it out for me. Unfortunately he was more interested in eating it than anything else.


So now I have my SSD I went about the task of installing it, physically installing the drive was no issue except for one small problem, all SSDs come in 2.5inch format- the size formerly reserved for laptop hard disks. My case is a Coolermaster HAF932 and it doesn't cater for 2.5inch drives. I can't understand why they abandoned the 3.5inch format, this would have retained compatibility with the majority of cases out of there. Some SSDs such as the Corsair model *sigh* come with a little drive bay converter, I would say this isn't really required because these drives have no moving parts, they require neither acoustic dampening or active cooling diverted onto them. I simply installed the drive with some double-sided Velcro tape to the bottom of my case, out of sight and out of mind.

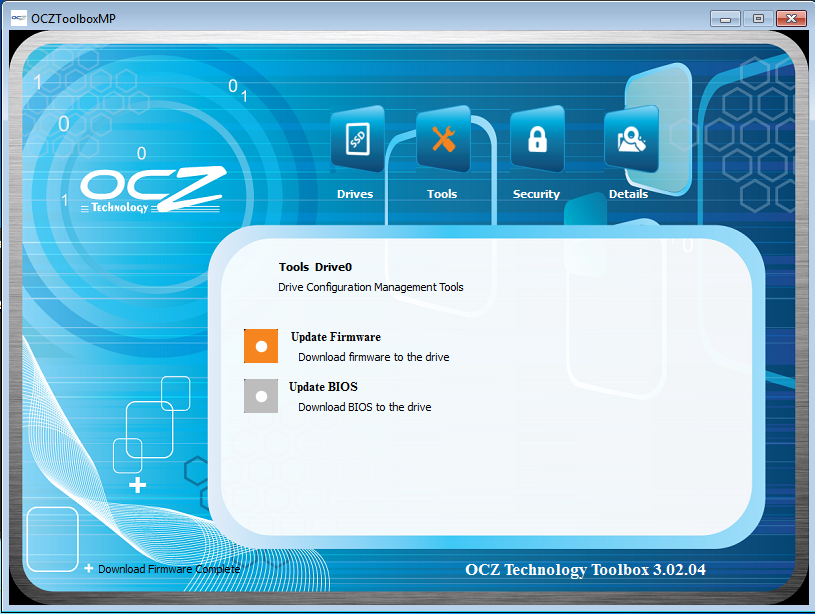
Currently I have a raid 10 setup on my main controller (4 x hdds), this controller has six ports in total, in addition my motherboard has two lower rated ports connected to a Marvell SE9120 controller, generally you want to not use the Marvell controller as the speed can be very poor, these kind of ports are more suited to SATA DVD RW drives etc. As I wanted to check the firmware version on the drive and ensure it was up to date before I started using it I connected up the drive onto the Marvell Controller, ensured it was set to AHCI and then proceeded to load my operating system. I downloaded OCZ firmware update tool "OCZ Toolbox version 3.02.04" and then started the software. Although windows could see the drive and I could copy files to the drive, the software was unable to see the drive to update.

Where the heck is my drive?

I then went reading OCZ support forums and found that many people experience this issue, it turns out that not only does it have to be a AHCI controller you connect the drive to, it must also be the primary controller - poor show OCZ. It also turns out that you can't update the firmware from the same drive your OS is currently running as this is a destructive update, you certainly can't update from USB caddy either. This is now getting a little bit annoying.

I then plugged the SSD onto port 6 on the main AMD SB850 SATA Controller, went into the bios again. Because I'm using RAID on the other ports on this controller I need to set "SATA IDE Combined Mode" to disabled. This should allow these ports to be used for AHCI or RAID instead of native IDE(for DVD RW's etc).

Setting Sata IDE combined mode to disabled

OK, with that done I booted the OS..... again and then ran the OCZ Toolkit....again. You can see from the results below that I'm not a happy camper.


You can see here - It clearly says it's using AHCI


The OS sees it fine, why can't you OCZ toolbox?

In the end the only way I could make it work it was to install Windows onto another drive and install the OCZ drive as as slave,  I needed to use the built-in Microsoft AHCI driver, it failed to detect it completely with the AMD driver.

Hurrah! Finally!


OK now the easy part, I disconnected all my other drives and then installed my Operating system on the new SSD via WDS. The installation took around 15 minutes with my network being the constraint, pretty good.

A common misconception is "boot up time" is from when he PC is powered on until it reaches the logon screen - not true. The boot-up time is from from then point where POST ends until the logon screen. With the Agility installed my boot time with a fresh image, SP1 and all Windows updates and device drivers installed was 17 seconds, compared to 35 seconds with my 4x hdds in raid 10 setup. Not quite the seven seconds that some other people have reported, but still fast.

To put things into perspective here is the the relevant hardware I am using:
  • AMD Phenom II 1090t Processor @3.2Ghz
  • Asrock 890FX Deluxe 4 Motherboard
  • 16GB of Corsair Vengence DDR3 1600 RAM
  • 4X Seagate ST3500418AS 500GB HDDs in Raid 10 using the on-board AMD Chipset SATA Controller.
The disks in this configuration give me a Windows experience index of between 6.1 and 6.2 depending on whats running when performing the test, with the OCZ Agility I get 7.8.

Windows Experience index gives the drive 7.8

Running under my RAID 10 config under HD Tune 2.55 It shows me I have a maximum Transfer rate of 257 MB/sec and average of 197.6 MB/sec it's certainly no slouch.


Running HD Tune with the SSD however is in a totally different league with a maximum of 324.7 MB/sec and average of 271.7 MB/sec, although I do worry a little bit about the low minimum transfer rate.


I installed Battlefield 3 onto my Agility and this is where I really saw the benefits of SSD, before it would take quite a while to load the game up for the first time, the time between changing levels has been reduced dramatically, it's just a shame that everyone else hasn't got one of these as I find myself still waiting for other people to load up!

Although I'm pleased overall with the drives performance, I can't but help feel a little conned, the drive read/write speeds are nowhere near the advertised 500MB/s, whether this is due to the controller on my motherboard, AMD's drivers or the drive itself is difficult to say. I'll defiantly keep using the drive, but due to the small capacity it's likely it won't be long before it gets full up. I can see the future in the technology of this little drive, but in order to replace the traditional disk, they need to work on increasing the capacities while keeping the costs down. Software is another area in dire need of improvment - the OCZ workbench is a completely useless tool, I can only hope that the firmware installed on my drive isn't as poorly coded.

Friday 20 January 2012

Resolving Active Directory Account Lockouts


Account lockouts can be a real pain to fix if you don't know where the lock is coming from. In these days of mobile computing very few users restrict themselves to a single PC or device. Often IT departments have to allow multiple devices to utilise the same user account credentials whether that be on the company Desktops, Laptops, Smartphones or even home user equipment. The problem is that when you have so many devices it gets a bit tricky to see where the lock has come from and users inevitably begin to think there may be some kind of conspiracy against them when their account keeps locking; even if it is their fault!

Tools Required


To perform all steps in this guide you will require a few tools:
A PC with Admin Pack installed (for Active Directory access) and Acctinfo.dll installed
(http://www.microsoft.com/download/en/details.aspx?displaylang=en&id=18465)


Causes of Account Lockouts

The most obvious scenario is that the user is continuously inputting the incorrect username/password combination - but that's far to easy. Other scenarios include:


  • The user has changed passwords once they have logged on but have not logged back on again to re-sync their account.
  • A stored username/password in a program, perhaps one that requires separate proxy authentication is requesting access to the Internet and supplying an incorrect password.
  • A third party device, such as an Iphone connecting to webmail via RPC over HTTP with the incorrect password stored.
  • The user has mapped a network drive on a different machine using their credentials and choose “Save Password” option, which has now expired.
  • A scheduled task running with an invalid password.


Finding Where the Account Lockout Originated

The first thing is to make sure you know where the account lockout is coming from. Use Active directory with the ACCTINFO.DLL tab and check the time of the last “bad logon”.


Clicking on “Account Lockout Status” will bring up a list of domain controllers, allowing you to ascertain which domain controller the user locked out on first.


Right click the domain controller the account locked out on and choose event viewer, then organise by user and click on the username. You will see a "Failure Audit" at the time of lockout.


You will then be given the name of the machine the account has locked out on as well as an Idea what program may have caused the lock, see “Logon attempt by” field.


Sometimes this can be a very generic system process which will result in you having to perform further troubleshooting steps on the user’s machine.


Finding the Cause of the Lockout on the User Machine


Finding the cause of account lockouts on the local machine can be quite difficult due to the number of potential causes of this problem but some general advice is as follows:


  • Clean out the Temporary Internet Files and stored passwords in Internet Explorer.
  • Clean out the windows credential manager by running "Control keymgr.dll" from the run prompt and deleting all stored passwords.
  • Check the users “My Computer” for drive mappings created by the user; if there is anything out of the ordinary remove the mapping.
  • Check for unusual software that may require individual proxy server configurations such as Google Earth, or any programs that perform periodic updates.


Drastic Measures if you still can't find the lock


From the Account lockout tools copy alockout.dll to the user’s c:\Windows\System32 folder. Remotely connect to the users registry using regedit and navigate to this key:


HKEY_LOCAL_MACHINE\SOFTWARE\Microsoft\WindowsNT\CurrentVersion\Windows


Create a new REG_SZ key called "AppInit_DLLs" and set its value to “alockout.dll"


Now restart the PC and wait for the account to lock out again. Once it locks check the C:\WINDOWS\Debug folder for a file called “Alockout.LOG”.

If you open this file with Notepad you should see a list of applications which attempted to pass network credentials along with details on which was successful and which failed. Check what time the users account locked out in ACCTINFO.DLL and the look for the corresponding entry on the list, this will be the application causing the problem.

The final step is to find this application on the user’s computer and find a way to either remove the cached credentials or in worst case scenario it may be necessary to remove the program all-together.

Sunday 8 January 2012

SCCM Operating System Deployment Task Sequences

In  the past few months my business has been working on the move away from XP/Altiris to a Windows7/SCCM 2007R3 environment. I was working closely with an outside contractor to get the infrastructure in place and getting SCCM up and running, but before this was even completed I was tasked to begin considering how to perform operating system deployment (OSD). Looking at SCCM from a newbie perspective I will talk about the challenges I faced in getting my OSD to work successfully.

After some investigation I soon found out that SCCM offers multiple ways to deploy an operating system to new machines and also machines already on your network. So far I have tested and implemented the following:

  • PXE boot environment with unknown computer support - I have put a password on this at the moment so that users can't unknowingly image a newly added machine. This is useful where you might be in a scenario where you unbox and build multiple machines at one time, you really don't want to be messing around writing down MAC addresses to import for hundreds of PCS at a time.

  • Bootable WinPE CD/USB stick, this method means you don't have to enable a PXE server on the network and is useful in environments like mine that already have multiple PXE servers. Unfortunately this means you will have to manually import the machine MAC address and put it into the OSD collection before it can be installed.  The disadvantage here is that you end up with a duplicate system in SCCM once it is renamed, but providing you have scavenging set up it should disappear reasonably quickly.

  • If the PC you image is an existing PC with a previous OS (WinXP) you can simply for an install of the SCCM Client and then put the machine into the OSD collection. This can be very handy, but again it will create a duplicate machine in SCCM, which will be marked as "obsolete". This appears to be by design to avoid endless build cycles.

  • Stand-alone task sequence media on CD/USB stick for the entire task sequence onto a DVD - this method works well for remote/small offices that don't have any server infrastructure, but SCCM task sequences can be rather large, in my case I need 3 DVDs worth to fit my standard image. It looks like high capacity USB flash drives are more feasible in this scenario.
Task sequence media is easily created, simply go to "Operating System Deployment" > "Task Sequences" > select your OSD task sequence and click "Create Task Sequence Media"


You can then select the type of media to create or create an ISO of the image for later use. Coming from an Altiris background I have to say I was very impressed easy this was and how well this solution worked.


I've got ahead of myself a little bit here, the largest part of this was the creation of the task sequence to begin with. I was fortunate that I had a base Windows 7 install.wim. Unfortunately it had only been tested on a handful of different models of PCS. After an evaluation of my asset management database I found that I actually had 11 distinct types of desktops that would support Windows7 in my environment. At this point I got a bit of headache, thinking back to Altiris and the multiple images for Windows XP. I wanted to get away from this and have "one image to rule them all".

One Image to Rule them All

The first thing I did was to test my Boot.wim with each device to ensure two things:
  1. Each device could successfully boot to WinPE image.
  2. By pressing F8 during PE boot and using the command prompt I could verify that WinPE could see the Hard Disk Drive and Network Card.
Fortunately all devices booted to WinPE without issue, but some were missing the network card driver or storage controller. These would have to be injected to the Boot.wim before we could continue. This can either be done by mounting the image using DISM in Microsoft MDT2010, or in SCCM you can go to "Boot Images" > right click on your boot.wim and go to properties, then press the "Windows PE" tab, press the "Sun" icon and then select the drivers you want to be injected. In order for the drivers to appear on this list you will have to firstly import them.


Now I had a working preinstall environment I could then begin testing deploying my main image. The next thing I done was to visit the manufacturer websites and download all existing drivers for the products I wanted to move to Windows 7. I downloaded the drivers for eleven models in total and stored them neatly on my SCCM server, sorting by model and device type. I then had another decision to make.

Order Vs Chaos

After some research it would appear there are two ways to approach driver management. One being "Chaos" whereby you simply import every driver possible and then allow every machine being built to scan then entire available driver database.  The "Order" solution is a very controlled environment whereby you import drivers for each model into a package and apply only that specific package to its relevant model. Being lazy I liked the sound of Chaos, but In practice I found this method to be much slower at building machines; the more drivers there are available the longer Windows takes to sort through and determine which driver is the most suitable.


Fortunately, SCCM makes importing drivers very easy. Simply create a new folder in the drivers section, right click, select import and browse to the location you stored the drivers for that specific model.

I was surprised to find that even when you select x64 drivers only that the packages also seem to contain XP, Vista, x86 drivers too. If you are going to import the packages for an x64 image like mine make sure to remove these drivers.


Either click new package to create a specific package or select an existing package, ensure to tick "Update distribution points when finished" to ensure your drivers get sent to PXE for immediate use.


Trying to adopt the "Order" method was causing me to run into issues. SCCM doesn't like it when you try to import a duplicate driver. It turns out that it's quite common for several HP laptops and desktops to share the exact same hardware, this was causing an error when trying to import this driver even although I just wanted to put that driver into my specific machine package. To get around this I installed patch KB2213600 which will allow SCCM to import duplicates.

With this method I was left with eleven different driver packages which I could apply. The next question would undoubtedly be how does SCCM know to apply that specific driver package? 


Using  a WMI query to select the model name from the system bios as a condition for installation allows only this package to be installed.


It's not only drivers that benefit from this functionality, what about the differences in software between laptops and desktops? You won't want to install certain software such as a VPN client or a mobile connectivity suite on your desktops!  Luckily there are a couple of easy ways around this.

Below shows and example using the "IsLaptop" variable - note that this is only availble when you have MDT integration. Before checking for this variable you will need to perform a "Use Toolkit Package" and  a "Gather" from the MDT menu. 

This also seems to work bothways. IE you can use "isDesktop"


You can also check for the presence of a battery.


Hardware Based Applications

When I had created all my packages and performed some test builds I noticed that there were some systems that just wouldn't install the drivers without its accompanying piece of software. ATI and Nvidia graphics packages seem to be the worst culprits, as both rely on their "Catalyst control centre" and "Nvidia Control Panel" to offer any advanced functionality. Bluetooth drivers were also the same as each device requires its own custom Bluetooth stack. I read elsewhere that these types of programs were called "Hardware based applications" being that they blur the lines between drivers and software. I found the simplest way to deal with these is to treat them like any other piece of software. Referring to the suppliers documentation *cough* and after fiddling about I found all the required silent install switches.

So far I'm about 90% there towards finalising the build. There are always little tweaks to go back and add. The other big part of this will be a brand Active Directory/Group policy re-structure which will go a long way to configuring this build. I don't want to add too many registry fixes into the build, but inevitably these will keep coming. At this point my OSD task sequence looks like this.


Please note that grey items are currently disabled experimental steps I was toying with. In the end I don't think I really need these. Using the above I can perform a zero touch installation on a new out-of-box PC or reimage an existing machine by simply dropping the PC into the OSD collection.

Like I said, I'm still an SCCM newbie and I would appreciate any advice on improving this.

Andrew